Are your wound cleansing practices up-to-date? Find out with these top tips for cleaning wounds properly and choosing the right cleansers.
When you get clinicians together to talk about wounds, dressing choices are usually a popular topic. Wound cleansing? Not so much.
Cleaning a wound thoroughly – and frequently – is a crucial part of wound care. In fact, you should clean a wound every time you change a dressing – unless it’s contraindicated. Why is it so important? Cleaning a wound:
- removes loose debris and planktonic (free-floating) bacteria.
- provides protection to promote an optimal environment for healing.
- facilitates wound assessment by optimizing visualization of the wound.
So, how do you know if your wound cleansing practices are up-to-date? It all comes down to choosing the appropriate cleansers and cleaning the wound using the correct wound cleaning technique.
What Makes a Good Wound Cleanser?
When choosing an ideal wound cleanser, make sure it is:
- hypoallergenic
- nontoxic to viable tissue
- readily available
- cost-effective
- stable
A good wound cleanser should be effective in the presence of organic material, such as blood, slough, or necrotic tissue. It should also reduce the number of microorganisms that form on the surface of the wound, and have a delivery force less than 15 pounds per square inch.
Common Types of Wound Cleansers
When considering wound cleansers, you’ll find the most common types are:
Normal saline solution
This type is the preferred cleansing agent because as an isotonic solution, it doesn’t interfere with the normal healing process. It’s also cost-effective and available in many different formats, including unit dose, half liters, liters and spray bottles.
Commercial cleansers
Ingredients in commercial cleansers may include surfactants, wetting agents, moisturizers, and/or antimicrobials. Surfactants are agents that facilitate removal of wound contaminants. Each surfactant molecule has a hydrophilic (water-loving) head that is attracted to water molecules and a hydrophobic (water-hating) tail that repels water and simultaneously attaches itself to wound contaminants, oils or grease. These opposing forces loosen the particles and suspend them in the water.
Skin cleansers
These types of cleansers are formulated to remove fecal matter, so they should never be used on open wounds (they tend to be stronger than a wound cleanser and toxic to wound tissues).
Lactated Ringer’s solution
Lactated Ringer’s solution provides sodium, potassium and calcium chloride to the wound while safely cleaning it and avoiding damage to viable cells. Note: be careful when the solution is used for continuous irrigation or allowed to dwell inside body cavities; otherwise, the solution could be absorbed into the bloodstream, leading to circulatory overload.
Potable (drinkable) tap water
Potable tap water can be used if there is no other alternative, just make sure to check the quality of the water source. Advantages of tap water for wound cleansing are efficiency, cost effectiveness and accessibility. However, make sure to use normal saline solution (instead of water) for wounds with exposed bone or tendon.
The Right Ways to Clean a Wound
Before you start the wound-cleansing process, make sure the cleansing solution is at room temperature (or slightly warmer). It can take up to 40 minutes after cleaning for a wound to regain its original temperature, and up to three hours for miotic cell division and leukocytic activity to return to normal.
Once the solution is warm and you’re ready to begin, wash your hands and put on gloves. Then consider using the following manual cleansing techniques.
Linear Wound or Incision
- Pour irrigation solution into the irrigation tray. Moisten clean 4″×4″ gauze pads in the solution; squeeze out excess.
- Gently wipe the wound from top to bottom in one motion, starting directly over the wound.
- Discard the used gauze pad.
- Using a new moistened 4″×4″ gauze pad, repeat cleaning, using a gentle downward stroke parallel to the incision.
- Repeat steps, working outward from the incision in lines parallel to the incision.
- Remember to use a new 4″×4″ gauze pad for each downward stroke.
- If needed, dry the wound, following the same procedure as for cleaning, using dry gauze pads.
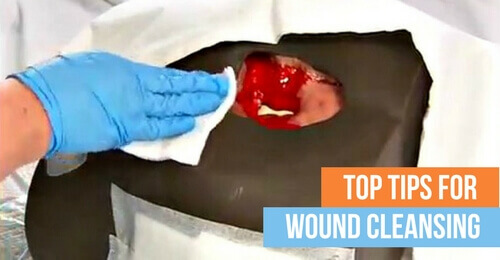
Open Wound Cleansing
- Pour the irrigation solution into the irrigation tray. Moisten 4″×4″ gauze pads in the solution; squeeze out excess.
- Gently clean the wound in a full or half circle, beginning in the center and working toward the outside.
- Use a new 4″×4″ gauze pad for each circle.
- Clean at least one inch beyond the end of the new dressing, or two inches beyond the wound margins if you aren’t applying a dressing.
- If needed, dry the wound, using the same procedure as for cleaning. Gently pat the wound dry, using dry gauze pads.
Using a Spray Cleanser
- Apply spray cleaners directly to the wound or onto clean 4″×4″ gauze pads applied to the wound.
- Check your organization’s policy for required personal protective equipment (PPE). Generally, wound irrigation that involves squirting, spraying or pressure release of fluid will require the use of PPE (such as gloves, a gown and mask with eye shield) to prevent exposure to debris and airborne microorganisms.
- Protect the environment, equipment, and other supplies from contamination from spray aerosolization by covering or removing the supplies.
- Hold the spray bottle approximately one inch from the wound bed. Aim the nozzle at the wound and squeeze the bottle, directing the stream of cleanser along the base and sides of the wound.
- Blot up excess moisture with a clean gauze pad.
- Dry the surrounding skin.
Cleaning With a Saline Bullet
- Position the patient so that the cleansing solution will flow by gravity from the upper end of the wound to the lower end.
- Twist off the top.
- Position the container at any angle required to access the area to be moistened or cleaned.
- Apply firm pressure to the container to obtain the desired flow rate.
- Blot up excess moisture with a clean gauze pad.
- Dry the surrounding skin.
After you have finished cleaning the wound, dispose of the waste in a trash bag. Remove and discard your gloves and any other PPE you used.
Do You Use Up-To-Date Wound Cleansing Practices?
Now that you’ve reviewed the common types of cleansers and the best techniques to clean wounds, we’re curious. What types of cleansers do you use the most? And which techniques are you the most familiar with? We’d love to hear your wound-cleansing stories and feedback. Please leave your comments below.
Wound Care Education Institute® provides online and onsite courses in the fields of Skin, Wound, Diabetic and Ostomy Management. Eligible clinicians may sit for the prestigious WCC®, DWC® and OMS national board certification exams through the National Alliance of Wound Care and Ostomy®(NAWCO®). For details, see wcei.net.
What do you think?